
Must-Try Peanut Butter Brownie Recipe
This Peanut Butter Brownie recipe is so simple and insanely good! Magic happens when fudgy chocolate meets creamy peanut butter. It’s the kind of dessert that stops you mid-bite, making you savor every swirl of flavor—deep, chocolatey goodness paired with the salty-sweet smoothness of peanut butter. Honestly, I might be a little addicted to brownies, and these peanut butter swirl brownies are the ultimate indulgence.
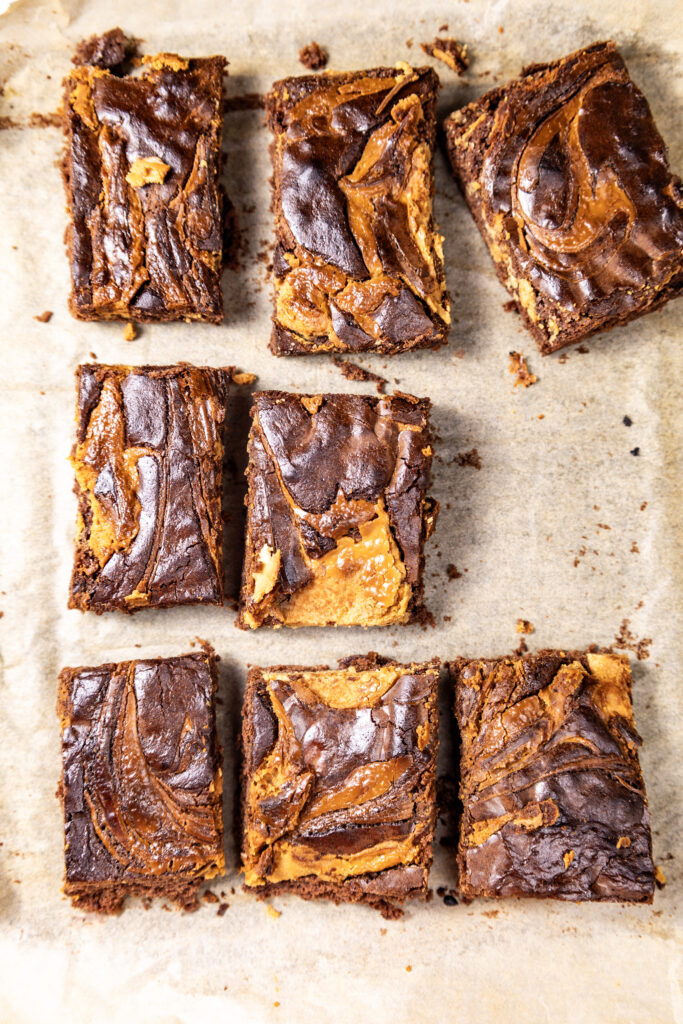
Few desserts balance indulgence and simplicity this well. Perfect for casual afternoons, fancy gatherings, or just because, these brownies deliver on taste and appearance without requiring hours in the kitchen. If you’re ready for a treat that’s incredibly easy to make but feels deliciously decadent, this recipe is your new best friend.
This site contains affiliate links, view the disclosure for more information.
Table of Contents
Ingredients You’ll Need for Peanut Butter Brownies
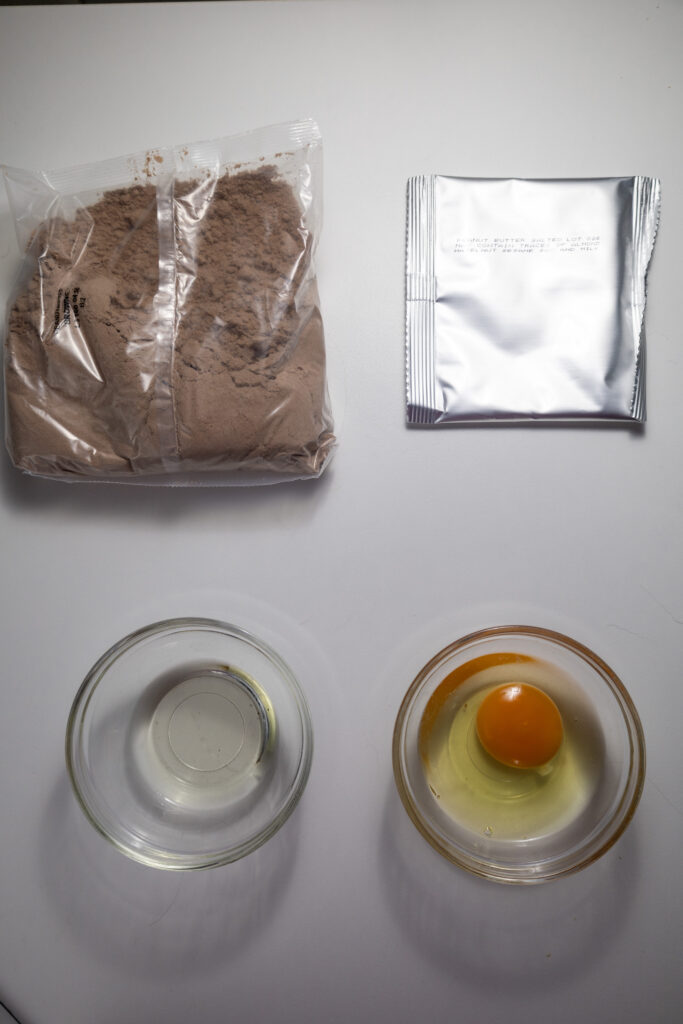
These brownies rely on a handful of pantry staples. While you can make everything from scratch, I love using my favorite brownie mix to cut down on prep time without sacrificing taste. Trust me, it’s a foolproof way to get perfect results every time.
Essential Ingredients
- 1 box Brownie Mix (or Krusteaz for gluten-free version) You can use any brownie mix, but my favorite is Ghirardelli’s. It produces deep, rich chocolatey flavors. If you need a gluten-free option, Krusteaz’s version is a fantastic alternative.
- 1/3–1/2 cup creamy peanut butter Use smooth peanut butter for that velvety swirl. Natural peanut butter works too, but make sure it’s well-stirred and not too runny.
Your boxed brownie mix will call for liquids and binders. It usually consists of:
- Vegetable oil This keeps the brownies moist and tender.
- Egg Vital for structure and binding everything together.
- Water Just enough to bring the batter to the right consistency.
Equipment and Tools for Preparation
Here’s what you’ll need to make baking a breeze:
- 8×8-inch square baking pan
- Parchment paper
- Mixing bowl
- Spatula or whisk
- Butter knife or skewer (for swirling)
- Measuring cups and spoons
How to Make Peanut Butter Brownies
This is one of those recipes that looks much more complicated than it is. This is a fun, easy recipe kids can help with.
Mixing the Batter
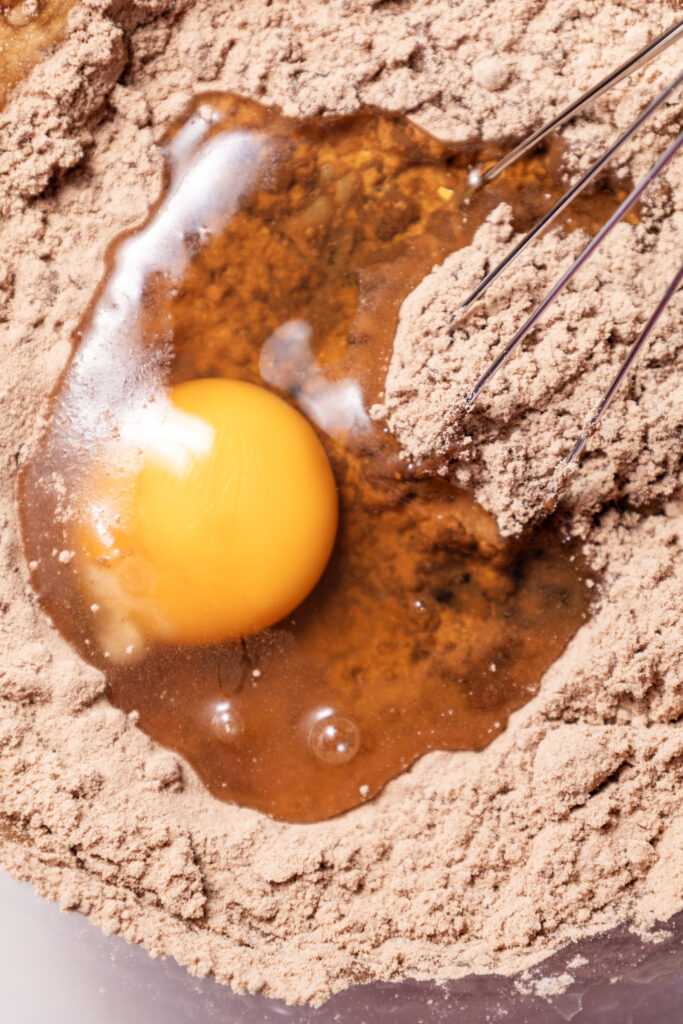
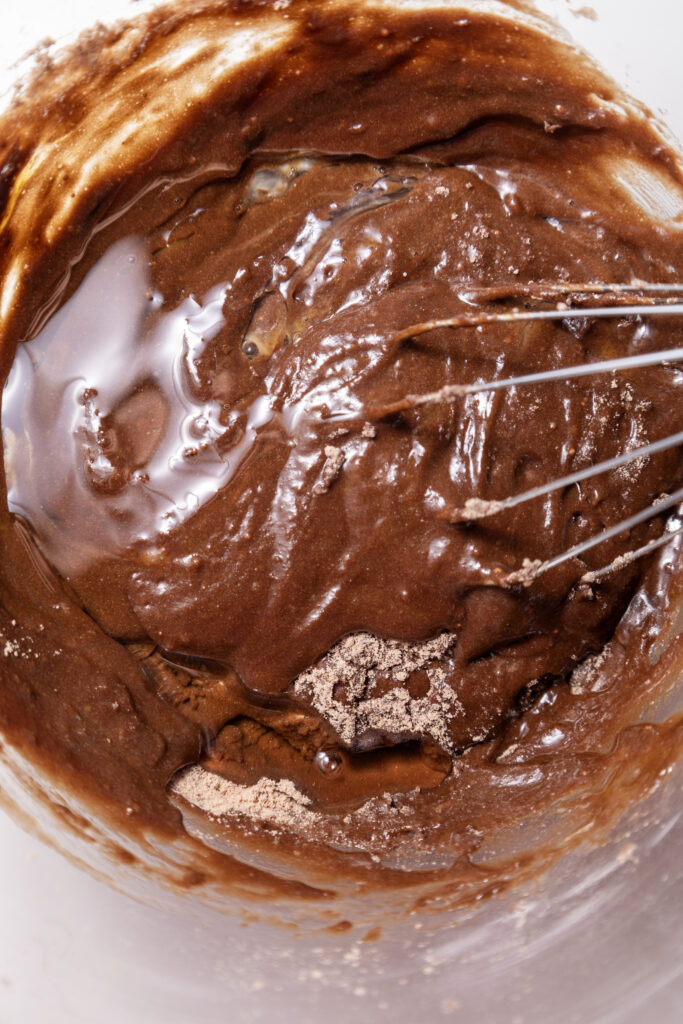
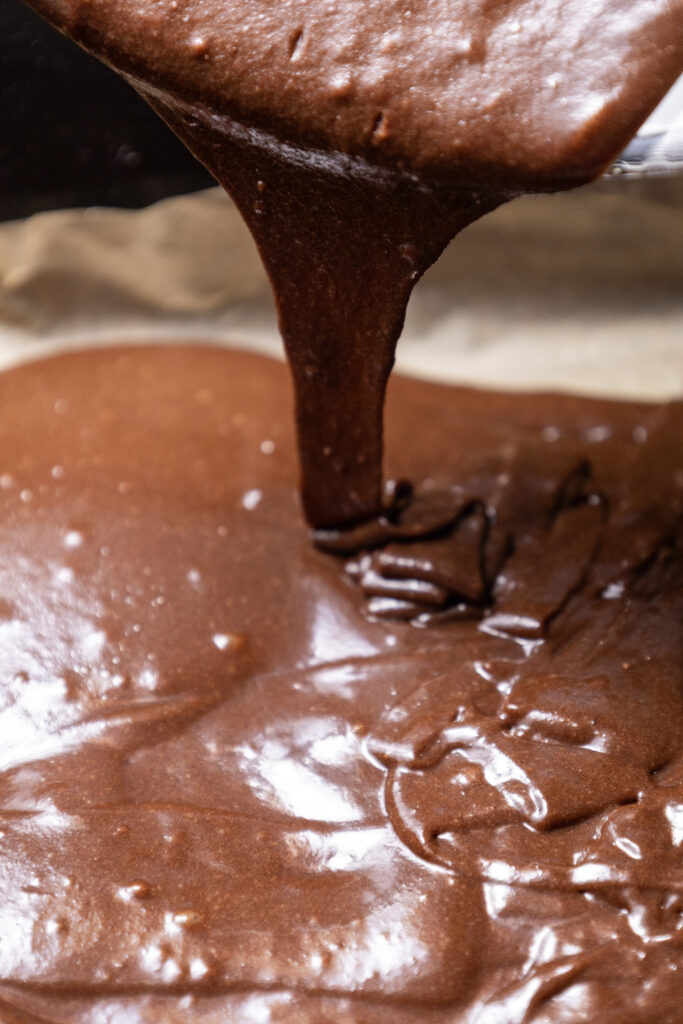
Start by emptying the brownie mix into a large bowl. Follow the instructions on the box. Don’t worry if there are a few small lumps; they’ll work themselves out as the brownies bake. A good rule of thumb is to stop mixing once you no longer see dry brownie mix.
Preparing the Baking Tin
Here’s a little trick I’ve learned: lining the baking tin with parchment paper isn’t just about preventing sticking. It also makes lifting the brownies out of the pan so much easier—no scraping or messy edges. Cut the parchment to fit the base, leaving extra paper hanging over the sides as “handles.”
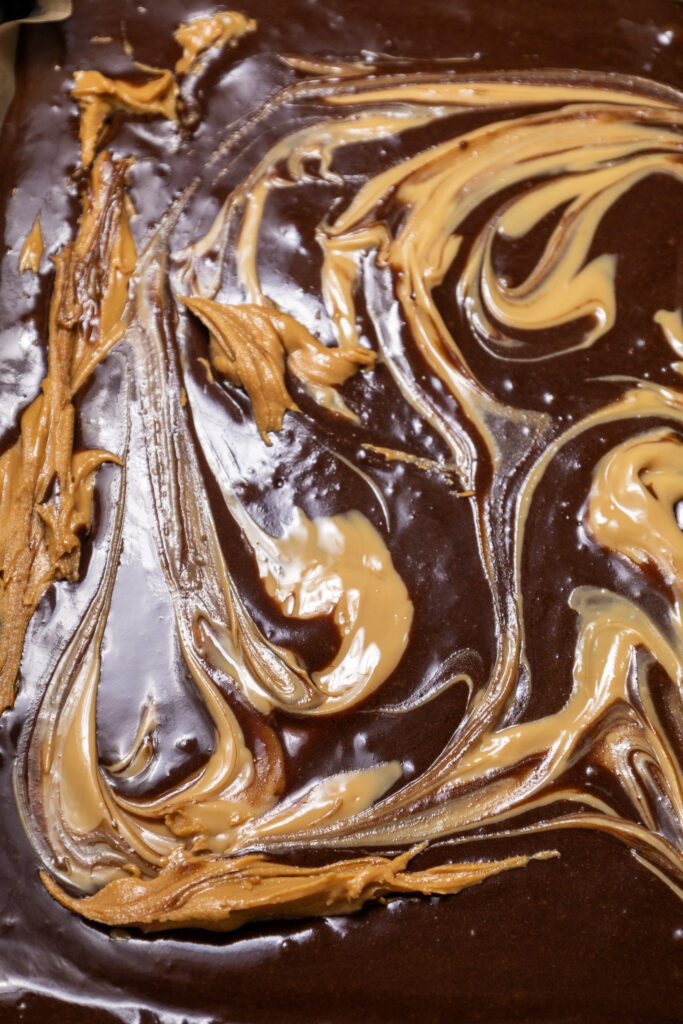
Achieving the Perfect Peanut Butter Swirl
Now comes the fun part! Pour the brownie batter into the prepared pan, spreading it out evenly with a spatula. Warm your peanut butter slightly in the microwave (10-15 seconds works well) so it’s easier to drizzle. Using a spoon, drop dollops of peanut butter over the batter. Then, take a butter knife or skewer and drag it through the dollops in a zig-zag pattern to create lovely swirls. The goal is to blend the two flavors without fully mixing them—you want those distinct ribbons of peanut butter.
Feel free to experiment with the amount of peanut butter. If you want a richer flavor, use closer to 1/2 cup.
Baking the Brownies
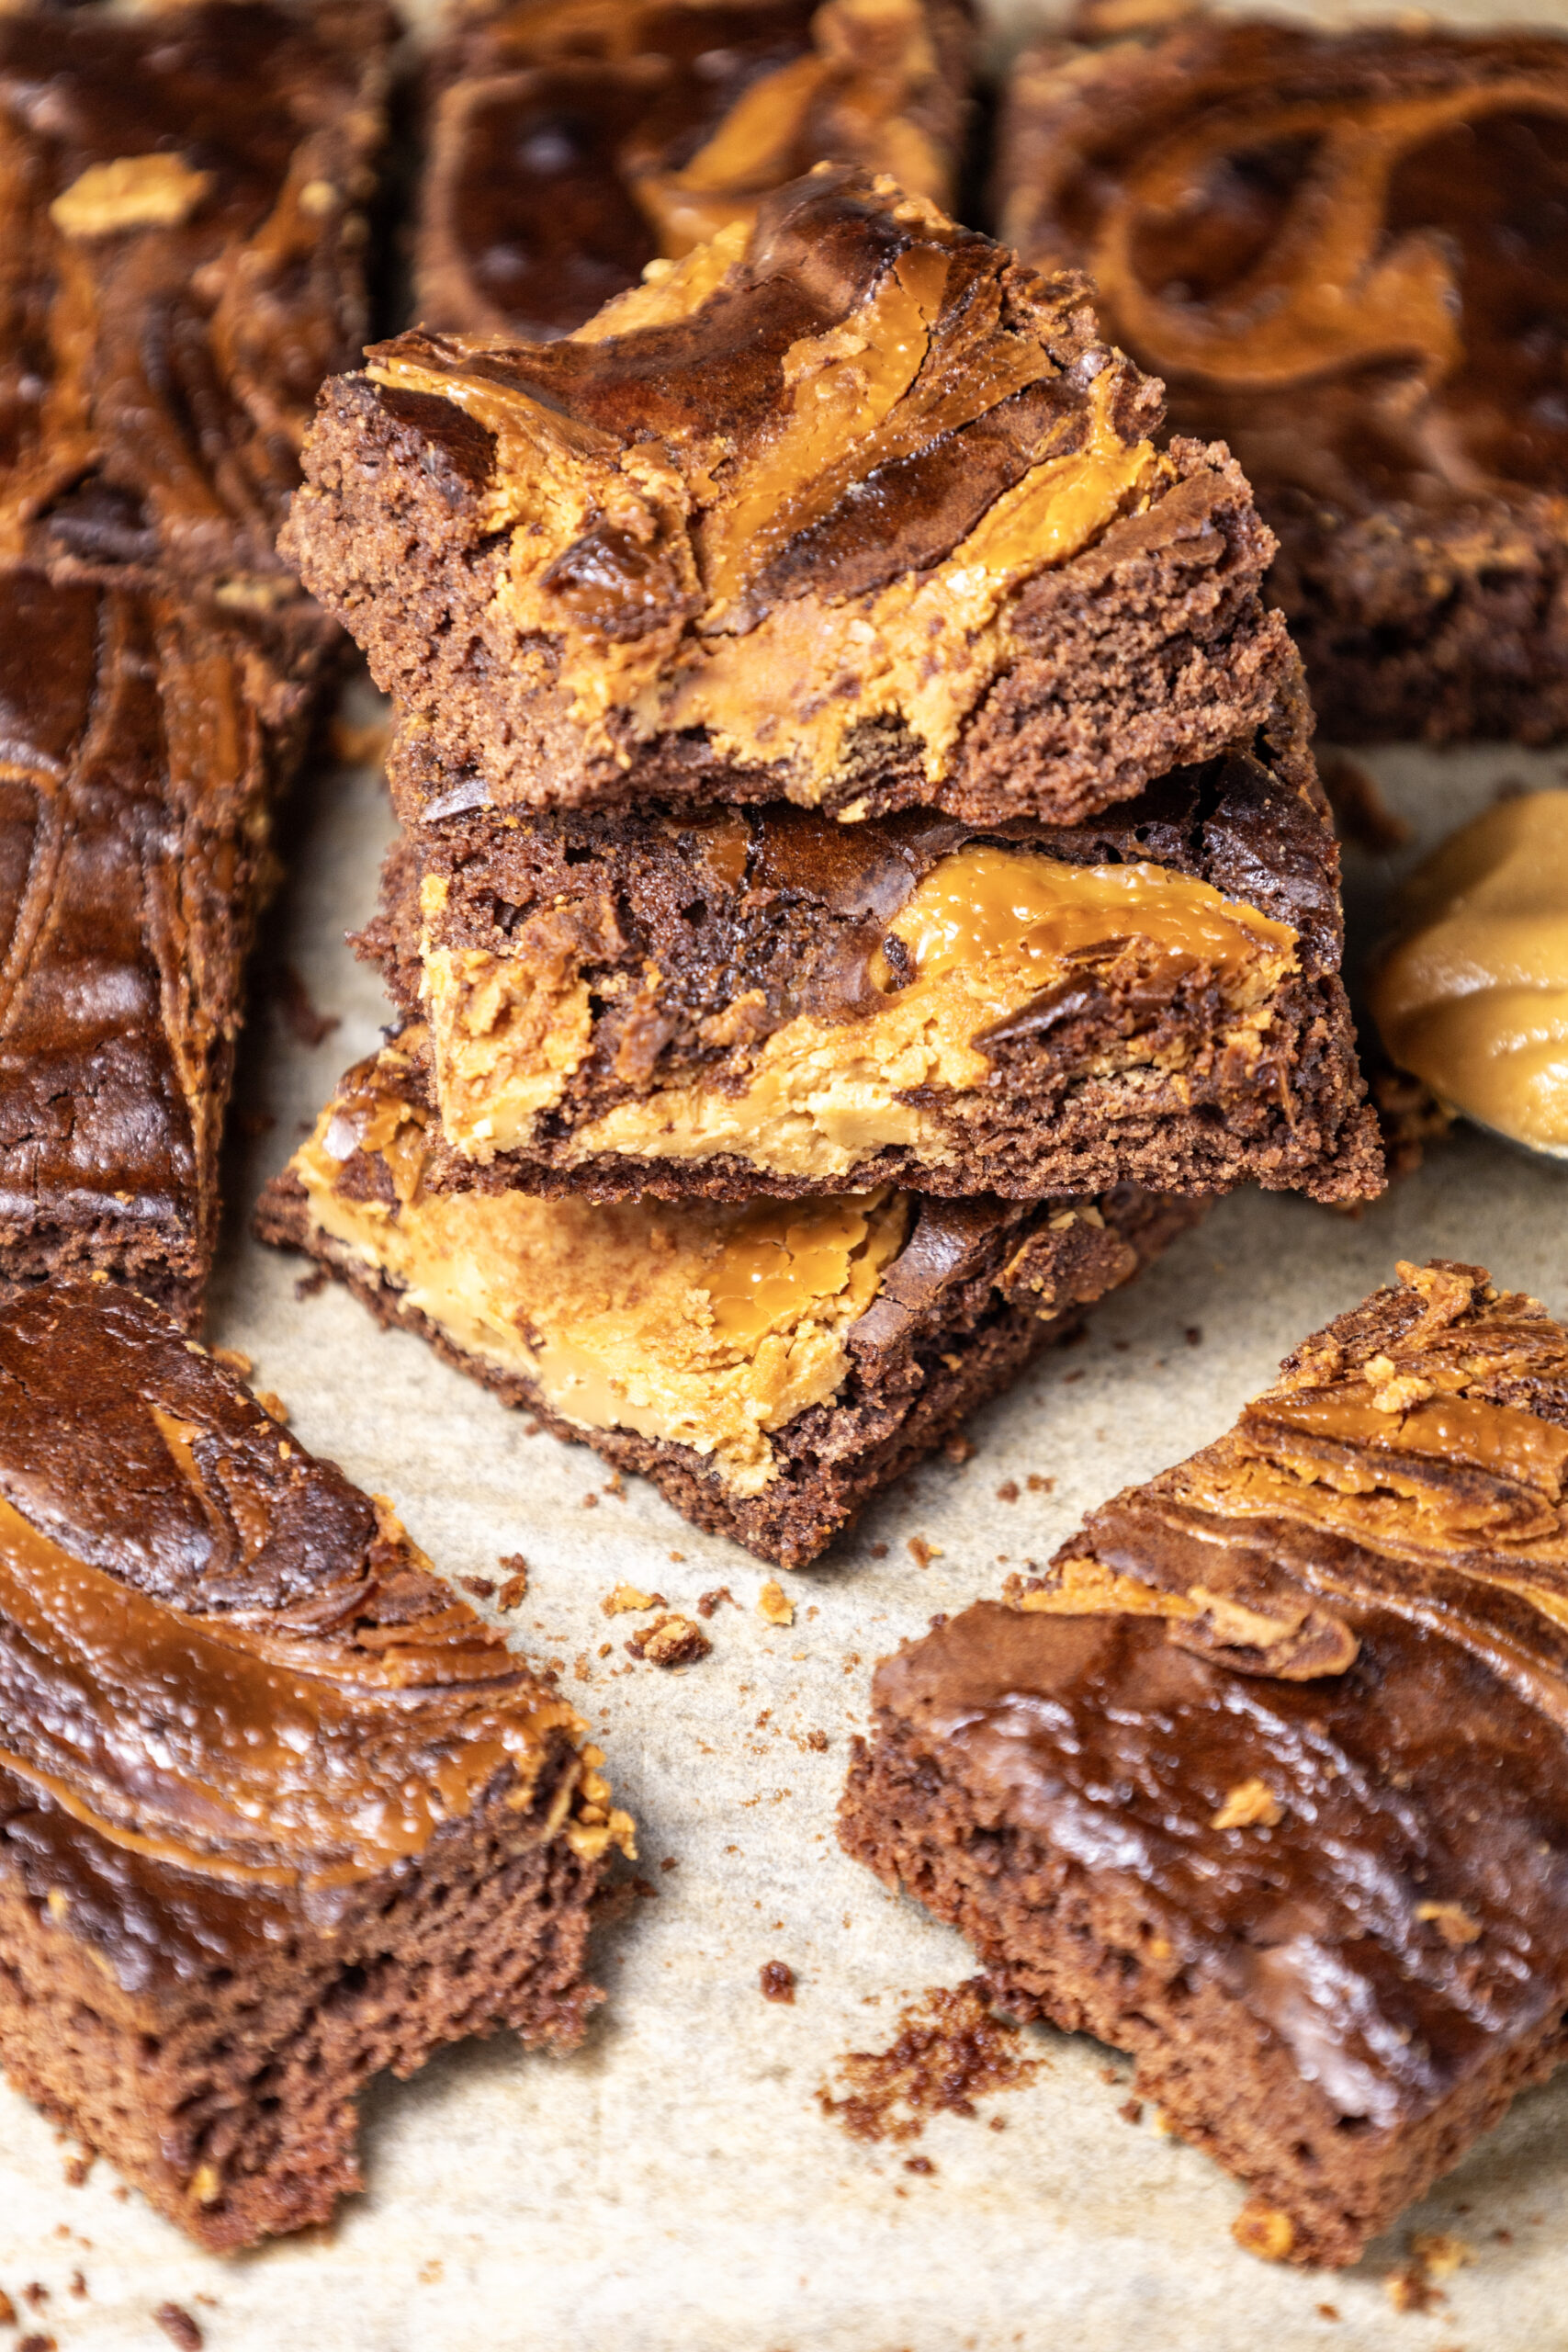
Preheat your oven to 325°F (or as directed by your brownie mix). Slide the tin onto the middle rack and bake the brownies for the recommended time, usually around 40 minutes, but start checking at the 30-minute mark. When a toothpick inserted about 2 inches from the edge comes out with moist crumbs (not wet batter!), they’re done. If it comes out with a few fudgy crumbs, you’re good to go. Avoid overbaking; the brownies will continue to firm up as they cool.
Cooling and Cutting Your Brownies
It’s tempting to cut into the brownies right away, but patience is key here. Letting them cool completely helps them set and makes for cleaner slices.
Cooling Process
Transfer the tin to a wire rack and let the brownies cool for at least an hour. The parchment paper handles will make it easy to lift them out without any crumbling.
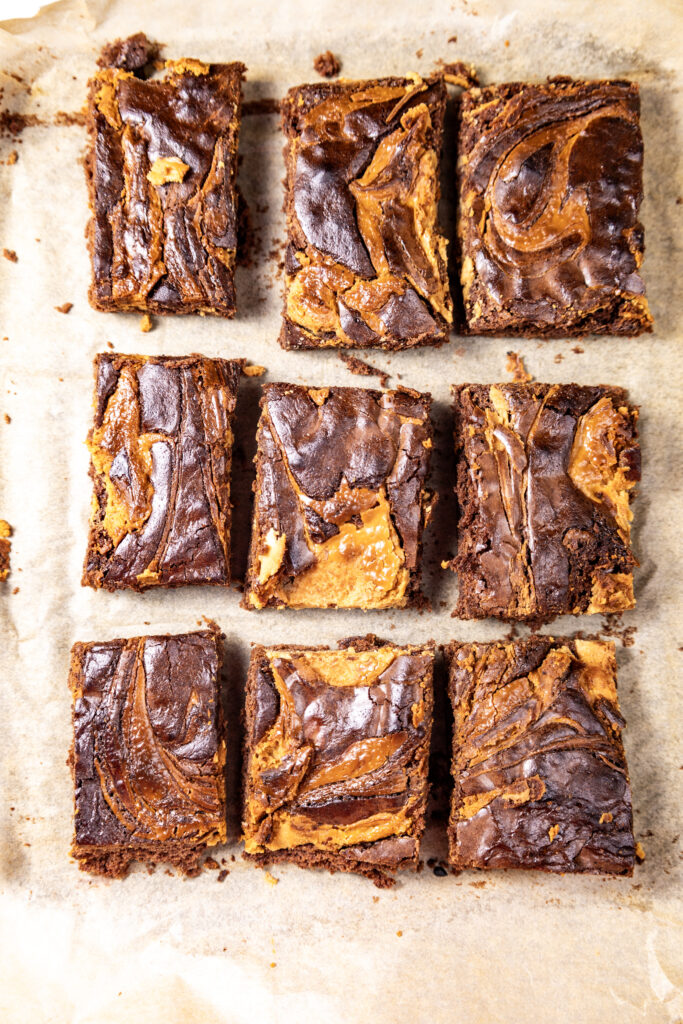
Cutting Tips for Even Squares
Here’s how to get picture-perfect squares: use a sharp knife and clean it with a damp cloth between each cut. For standard-sized portions, slice into 9 squares (3×3). If you’re serving a crowd or want smaller bites, feel free to cut into 16 pieces (4×4).
Serving and Storing Peanut Butter Swirl Brownies
These brownies are as versatile as they are delicious. Whether you’re serving them fresh out of the tin or storing them for later, they’re always a hit.
Serving Suggestions
There’s no wrong way to enjoy these brownies! Pair them with a scoop of vanilla ice cream for an indulgent dessert, or drizzle a little caramel sauce over the top for extra decadence. A cold glass of milk is always a classic choice, but if you’re feeling fancy, serve them with a cup of coffee or even a dessert wine.
Storage Tips
Store leftover brownies in an airtight container to keep them fresh. They’ll stay moist at room temperature for up to 3 days. If you want them to last longer, pop them in the fridge for about a week. Just be sure to let them come to room temperature before serving—they’ll taste just as good as the day you baked them.
More Desserts You’ll Love
Craving more sweet inspiration? Check out my other yummy dessert recipes for even more treats to satisfy your sweet tooth! From cookies to cakes, there’s something for every dessert lover.
Life’s Better with Peanut Butter Swirl Brownies
Peanut butter swirl brownies are one of those recipes that feel both special and effortless. I love how they combine two timeless flavors in a way that’s both comforting and impressive. Plus, with the help of an excellent brownie mix, you can whip them up in no time at all.
Whether you’re making these for a party, a bake sale, or just because, they’re bound to disappear fast. Feel free to put your own spin on the recipe—add a handful of chocolate chips, sprinkle sea salt on top, or try chunky peanut butter for a bit of texture. Whatever you do, have fun and enjoy every bite. Trust me, this will become a staple in your dessert rotation.
Peanut Butter Brownies
Equipment
- 8×8 – inch baking pan
Ingredients
- 1 Box peanut butter brownie mix any brand
- 2-4 tbsp peanut butter
- Ingredients listed on the brownie mix box (typically eggs, water, and oil)
Instructions
- Preheat oven to 325F (or the temperature listed on your brownie mix box).
- Follow the directions on the box, mixing the brownie mix with the required ingredients (typically eggs, oil, and water) until smooth.
- Place parchment paper in an 8×8-inch baking pan and pour the brownie batter evenly into the pan.
- Drizzle or dollop the peanut butter on top of the brownie batter. Use a toothpick or butter knife to gently swirl it through the batter for a marbled effect.
- Bake the brownies for the recommended time, usually around 40 minutes, but start checking at the 30-minute mark. When a toothpick inserted about 2 inches from the edge comes out with moist crumbs (not wet batter!), they’re done.
- Let the brownies cool in the pan for about 10 minutes, then transfer to a wire rack to cool completely. Once cooled, cut into squares.
- Enjoy!


